1st color
Page 02
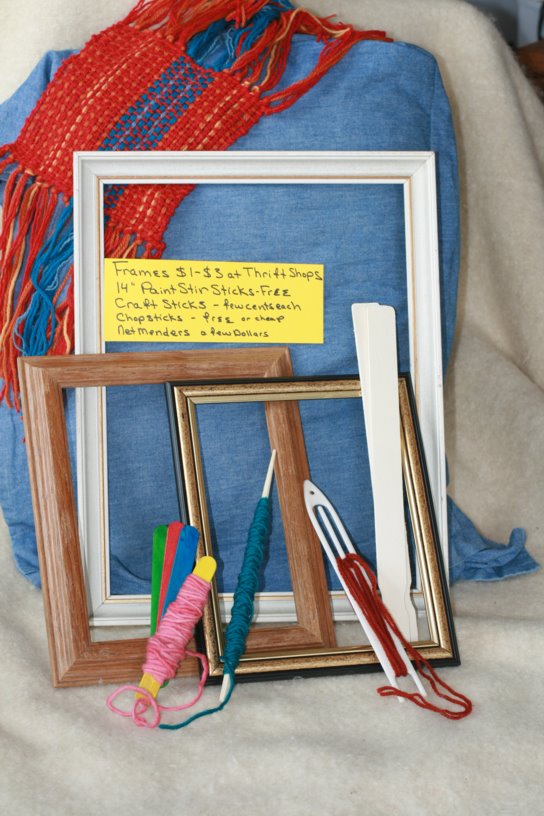
Items to buy or scrounge:
Your frames could be 10" X18", 14" X 16", or sizes inbetween. About $1-$3 at thrift shops. Note: if you get small frames you won't have enough manuvering room. If your frame is wider than 14" you can't use a long clip board for your back panel. You'll need to buy an Artist's Canvas Panel.
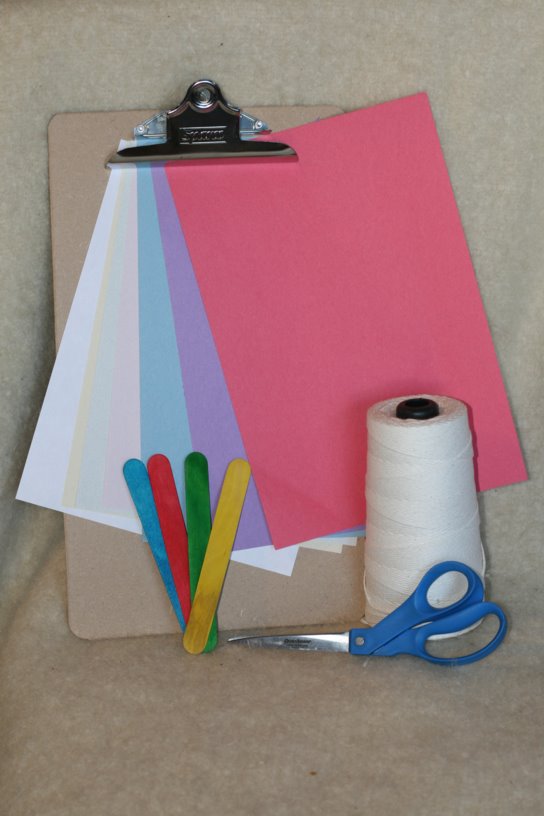
A legal pad length clip board 14"s long (about $1.35 + tax)
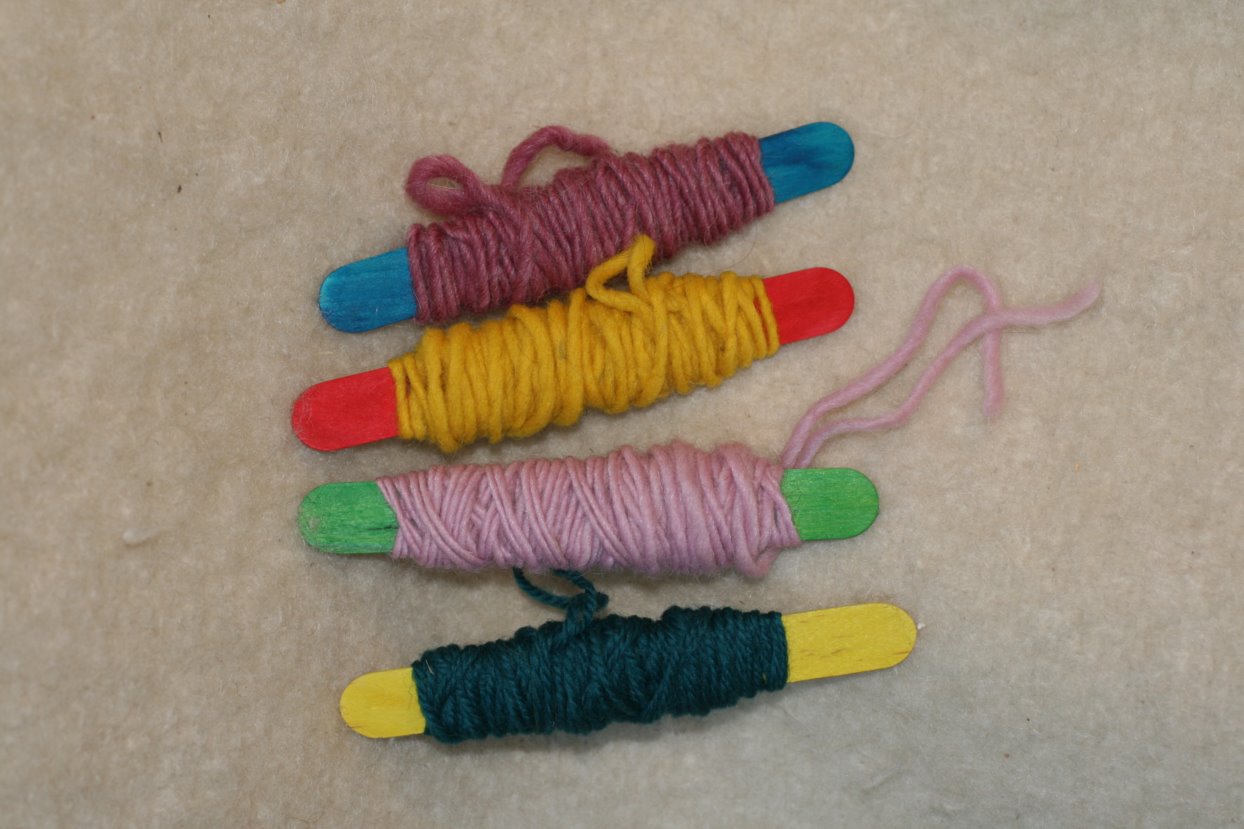
Some fat, colored, craft sticks/tongue depressors available in craft stores or Wal-Mart's craft section.
White and colored paper or cloth for visual contrast behind the weaving
Kitchen twine and round tipped scissors
Natural fiber yarns; synthetics slip and "pill"
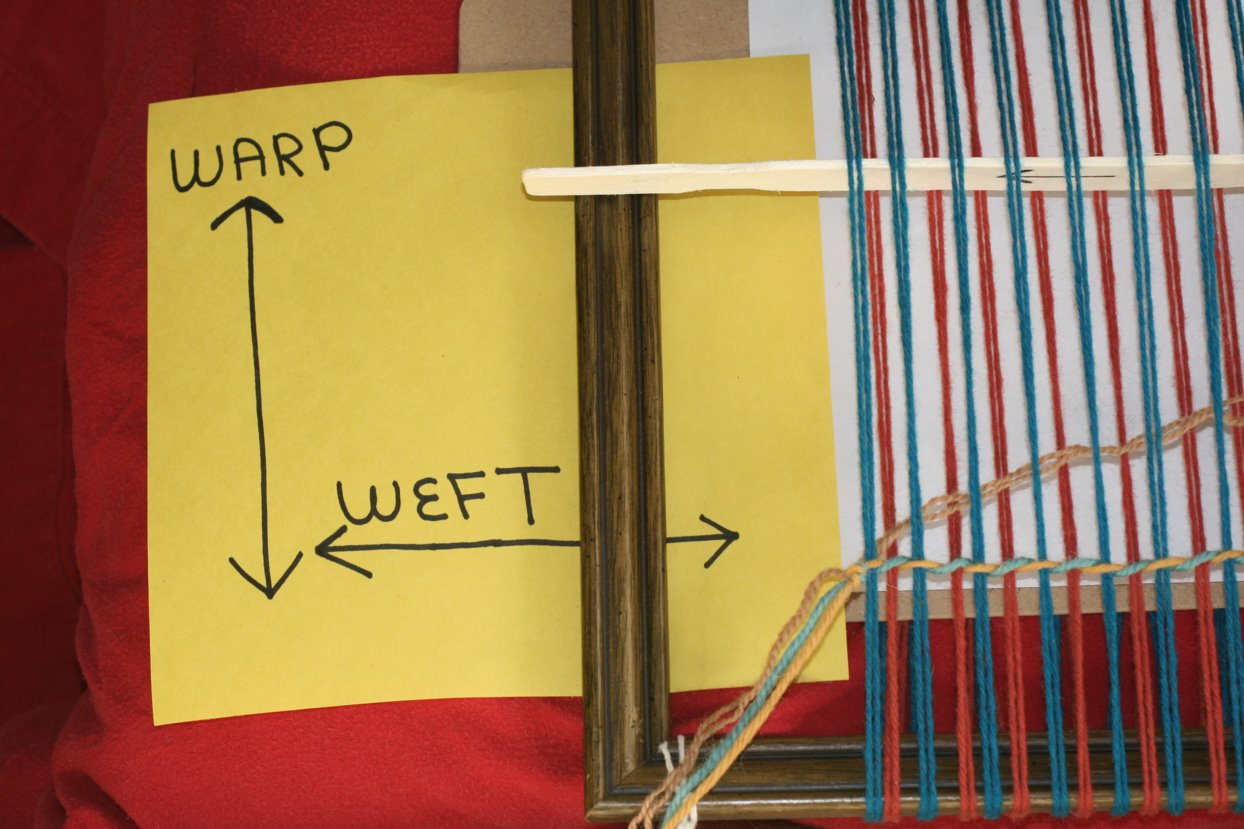
WARPING YOUR FRAME.
Warp yarns are those which run up and down; they are the "roots"
of your weaving.
We'll use two different colors of warp yarns to easily differentiate odd from
even.
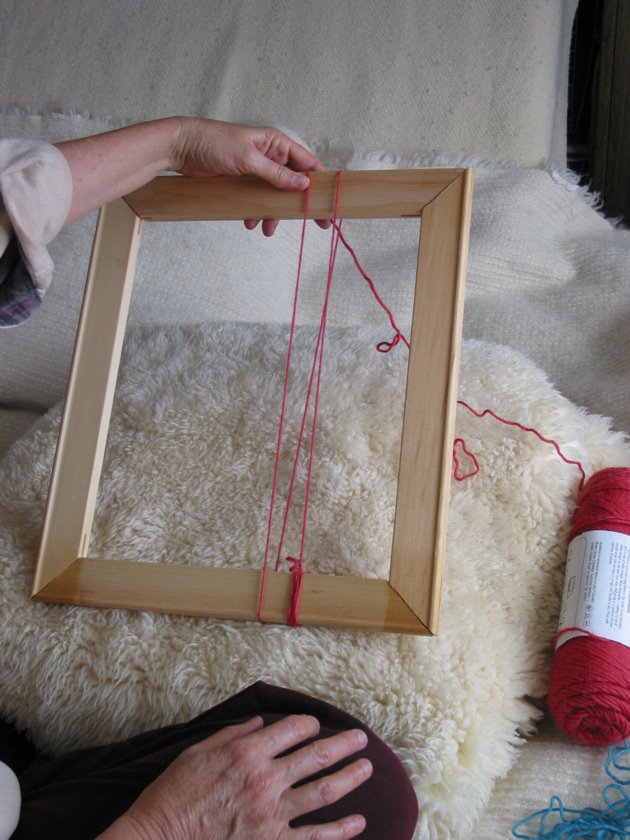
Warping refers to putting the warp/up and down yarns on your frame loom. We'll
be using a continuous loop method.
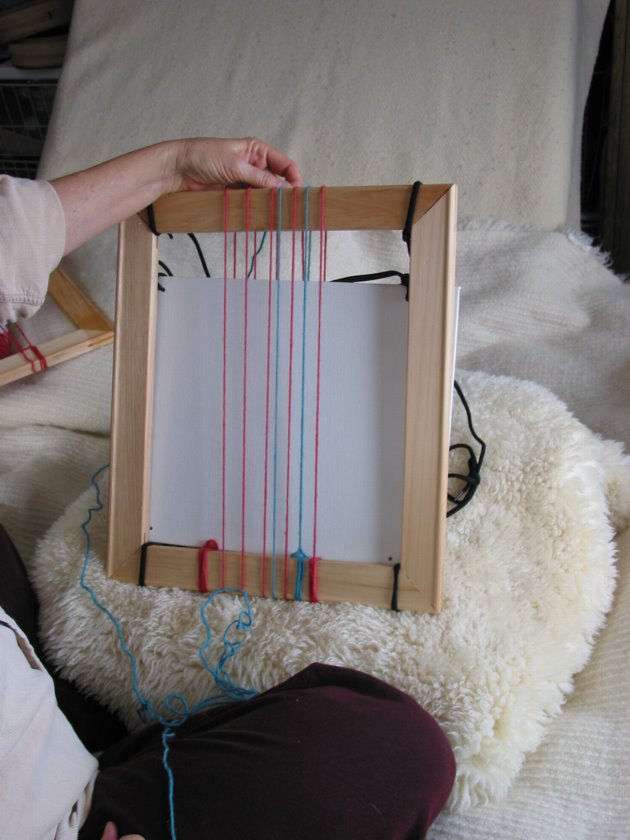
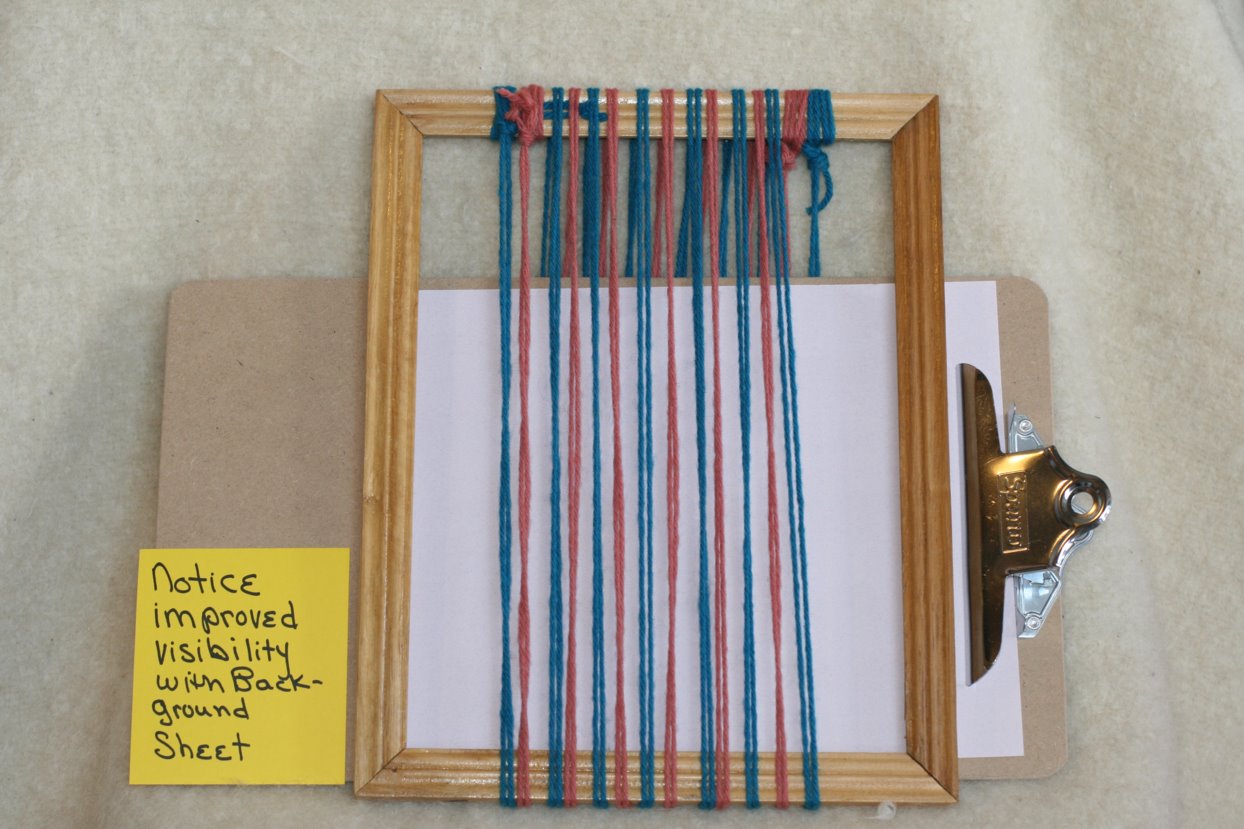
(Be aware that even with great vision it can be hard to see which yarn strands are which and to differentiate the background information of pillows and knees and the back strands of yarn on your frames. So, later we'll be using the clip board, and whatever colored paper works best, as a backdrop for our project.)
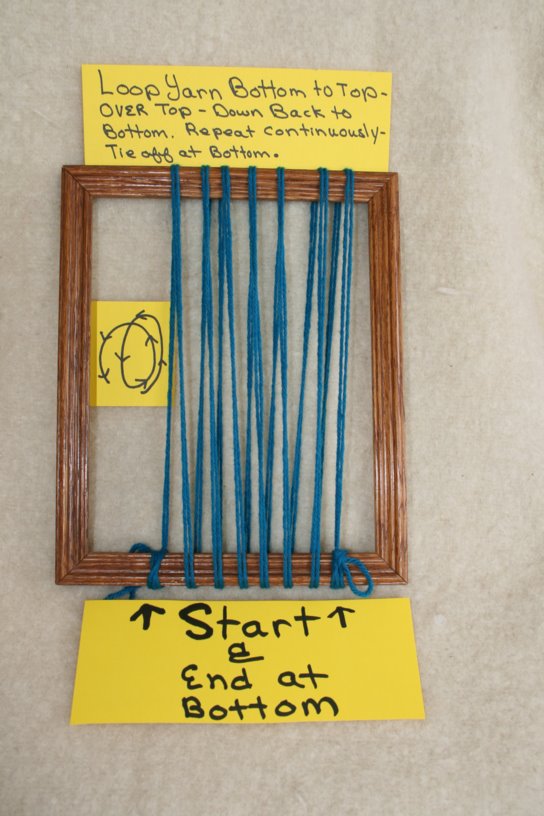
Start with your first color several inches in from the frame edge. Wrap the
yarn several times at the frame's bottom. Go up to the top of the frame, over
the top, down the back, then up again is 5 to 7 continuous loops ending at the
bottom with several wraps around the bottom of the frame. Space the loops about
1 inch apart for your FIRST COLOR.
By using an odd number for the first color your edges will be the same color
which will look nice for our first, loose, weaving.
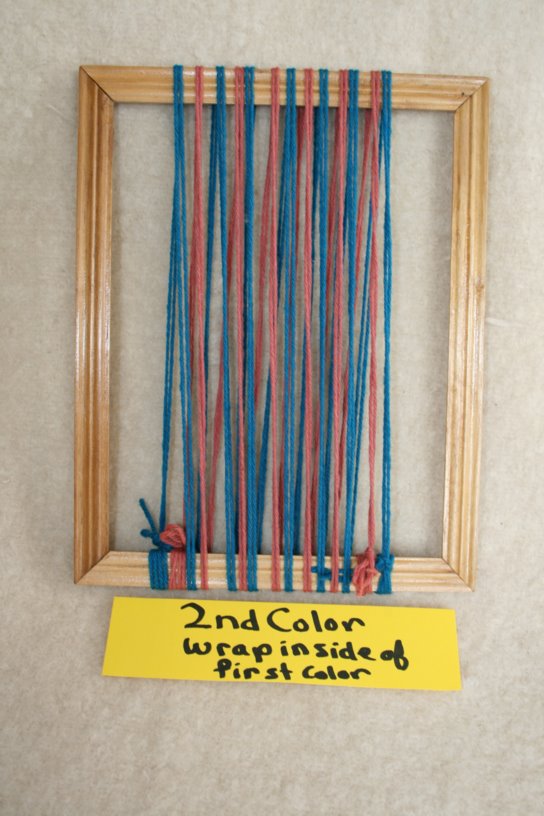
Take your second color and start just inside the first warp's upward strand
and make your loops the same a before only space them IN BETWEEN color number
one ( see pictures). End with an even number INSIDE of color number one. You
now have a spacing, between the warp strands of, approximately ½ inch
per warp.
NOTE: With ½ inch spacing of warp yarns you can't easily weave in shapes like circles, hearts, or bunnies. You need ¼" or less spacing for shapes. However, with your wider spacing, which is good for little, learning fingers and older stiff fingers, you can do things like push in pieces of fabric or fleece. You can also, easily, tuck in pieces of dried flowers etc.
Try ½' spacing for first projects and with little ones etc.. Consider fat yarns, or regular thicknesses of yarn doubled or more for your first warps. It's nice to have a project that goes quickly to begin with.
Click on Thumbnail Pictures to Bring up Full Page of Pictures
|
|
|
Stick Shuttles |
|
clip board |
|
1st color
|
|
notice better vis |
|
warp and weft sign |
|
buly 1st warp text |
|
2nd warp wrapped inside |
|
clip board notice loops now at top |